Discover various interesting information about How To Make A Track Fade Out In Garageband, all of which we’ve summarized from various reliable sources.
Music production often involves creating smooth transitions between different sections of a track. Fading out a track is a technique used to gradually reduce the volume of a track over time, creating a seamless and professional-sounding transition. In GarageBand, fading out a track is a simple process that can be achieved using the following steps:
How To Make A Track Fade Out In Garageband
Step 1: Select the Track
Begin by selecting the track you want to fade out. Click on the track in the Tracks List to highlight it.
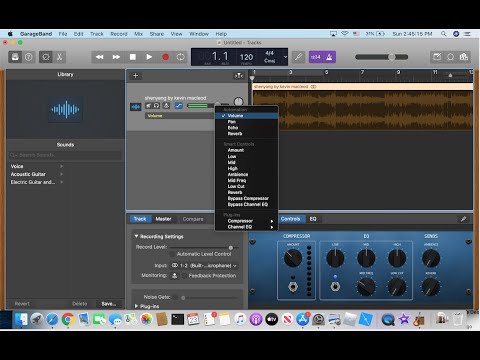
Step 2: Open the Automation Editor
Next, open the Automation Editor by clicking on the “Edit” menu and selecting “Automation.” This will display the Automation Editor window.
Step 3: Create a Volume Envelope
In the Automation Editor, click on the “Volume” parameter for the selected track. This will create a volume envelope, which is a graphical representation of the track’s volume over time.
Step 4: Draw the Fade Out
To fade out the track, drag the end point of the volume envelope downward. The envelope will create a downward slope, gradually decreasing the volume over time.
Step 5: Adjust the Fade Duration
The length of the fade out is determined by the distance between the start and end points of the envelope. Adjust the length to create the desired fade-out duration.
Step 6: Preview and Adjust
Click on the “Play” button in the Automation Editor to preview the fade out. Make any necessary adjustments to the envelope to refine the transition and achieve the desired effect.
Expert Tips for Fading Out Tracks
1. Use a Gradual Fade
Avoid abrupt fade outs. Instead, create a gradual slope in the volume envelope for a smoother and more natural transition.
2. Consider the Context
The length and shape of the fade out should complement the track’s style and mood. A shorter fade out may be suitable for a quick transition, while a longer fade out can create a more dramatic effect.
3. Fade Out Background Elements
If the track features multiple layers, fade out the background elements first. This helps maintain the focus on the main melody or vocals during the transition.
Frequently Asked Questions (FAQs)
Q: Can I fade out a track after it has already been recorded?
A: Yes, you can use the Automation Editor to fade out a track even after it has been recorded.
Q: Can I fade out a track in real-time during playback?
A: While GarageBand does not allow for real-time fade outs, you can use external plugins or software to achieve this effect.
Q: Is there a limit to the length of the fade out?
A: No, there is no limit to the length of the fade out in GarageBand. However, it’s important to consider the overall length and pacing of the track when creating long fade outs.
Conclusion
Fading out tracks is a fundamental technique in music production that allows for seamless transitions and adds a professional touch to your recordings. By following the steps outlined above and implementing the expert tips provided, you can effectively fade out tracks in GarageBand and enhance the overall quality of your productions.
Have you ever faded out a track in GarageBand? Share your experiences and any additional tips you may have in the comments below.
How To Make A Track Fade Out In Garageband

Image: makebeats101.com
Thank you for visiting our website and taking the time to read How To Make A Track Fade Out In Garageband. We hope you find benefits from How To Make A Track Fade Out In Garageband.